Blog

  • drop-bucket

    DropBucket

    DropBucket is a self-hosted file sharing tool. It relies on AWS infrastructure for implementing storage, user authentication, and the service infrastructure.

    It’s meant to be used to share files with people in a transient way.

    Philosophy

    Simple. Fast. Scalable.

    Sharing files

    Public sharing links

    There are two ways to share files with DropBucket. The first, is from the ‘My files’ tab. Clicking on ‘Copy sharing link’ will copy a direct link to the files which can be shared up to the point where the files are automatically deleted. If you just want to send someone a link and you don’t care if they re-share the link, this is the way to go.

    Private sharing links

    If you want to force someone to have to sign-up to DropBucket before being able to download things, you can use the ‘Share file with…’ button on the ‘My files’ tab. This will prompt for the email address of the person you want to share the file with. They will receive an email invite requesting them to visit the site

    Use cases

    You are security conscious and you need to share files with collegues, but don’t want to email them, send them over slack, etc…

    You have regulatory or contractual provisions that prevent you from sharing files unsecurely and need to know exactly where your data is being stored and how it’s being managed.

    You need to share big-ish files.

    You’d like ot make sure that when people send you files, they are automatically scanned for viruses.

    Security

    All client-server operations (authentication, directory listing, uploads, downloads) are secured by strong transport encryption (TLS). At rest, files are encrypted in S3 using server-side AES-256 encryption.

    The standards-based identity component (Cognito) is managed by AWS and is compliant to multiple certifications (HIPAA, PCI DSS, SOC, ISO/EIC 27001, ISO/EIC 27017, ISO/EIC 27018, and ISO 9001). It can be federated with a variety of identity providers if desired.

    The file storage component (S3) is designed for 99.99% availability, and 99.999999999% durability.

    All files are scanned for viruses automatically on upload by the Clam Anti-Virus software. Virus definitions are updated daily.

    Policy on the storage backend will prevent access to files that have been tagged as being infected by viruses.

    All files are automatically deleted after 7 days via S3 bucket lifecycle policy.

    You get to control which AWS region your files are stored in.

    Scalability

    As this is a serverless architecture relying heavily on AWS infrastructure, it could easily scale to millions of users storing petabytes of data without requiring any specific scaling actions (with the possible exception of increasing service limits for API Gateway/Lambda/S3).

    The client application is a single-page application, and communicates with the S3 API, AWS Cognito, API Gateway, and AWS Lambda functions.

    Limitations

    The default installation will host the website on S3 static website hosting. This is non HTTPS, although it’s easy enough to create a CloudFront distribution in front of it and force SSL from CloudFront.

    The tool currently will limit uploads to 300 Mb, as that is a limitation of the virus scanning. The limit is imposed due to the relatively small amount of disk space that is available to Lambda functions (500 Mb). When factoring in the virus scanner and virus definitions, there’s only about 300 Mb of usable space left. I’m erring on the side of caution, if a file can’t be scanned or doesn’t have a clean scan, it is not accessible.

    This is a browser based application. If your browser is old, this might not work for you.

    It doesn’t keep your files in sync, it’s up to you to upload files.

    It’s not a collaboration tool, it doesn’t do any versioning.

    Pricing scenario

    This scenario assumes the US-EAST-1 AWS region.

    You have 50 users who each need to store 100 files each, totalling 1 GB per user.

    S3

    The storage costs on that are $0.023 per GB * 50 GB: 1.15$ USD per month.

    If each user writes their 100 files every month, the S3 operation costs are:

    50 (users) * 100 (files) = 5000 requests * 0.005 per 1000 requests = 0.0025$ USD

    Let’s imagine the users generate 1000 list requests each per month, that would cost an additional 0.025$ USD

    Furthermore, let’s imagine that they each fetch all their 100 files once per month, the get operations would cost 0.0004 per 1000 requests, so that would cost 0.002$ USD.

    Data transfer into S3 is free, so we only have to look at the downloads.

    If every user downloads all their files once per month, the cost of that would be 50GB * 0.09 = 4.50$ USD

    S3 sub-total: 5.6795$ USD per month

    API Gateway

    Let’s imagine those same users login 1000 times to the app per month, the costs for API gateway would be 3.50$ per million API calls. Let’s highball it and assume one million calls.

    API Gateway sub-total: 3.50$

    Lambda

    There’s a perpetual free-tier for Lambda functions, and it’s highly likely that the service could run in the free tier with 50 users pretty much forever given the usage scenario I’ve described so far.

    If our users somehow generated 5000 requests to the Lambdas with a mid-size provisioned Lambda (1.5Gb RAM) and each execution took 30 seconds, the execution cost for Lambda would be 3.08$ USD.

    Lambda sub-total: 3.08$

    Cognito

    The first 50,000 monthly active users in Cognito are free.

    Cognito sub-total: 0$

    Total

    So the total all-in costs for this solution for our scenario is about 13$ per month.

    If in a given month users upload half as many files, the price would drop by half.

    Cost analysis

    Looking at some of the other options out there, you can get approximately 1 Tb of storage for about 10$ per month per user. That’s a pretty good price per user if all your users need 1 Tb of storage, but in scenarios where they only need a few gigabytes it’s pretty steep.

    1 Tb of storage in S3 is about 20$ per month. Definitely more pricey than some of the cloud storage options out there, on the long run I’d imagine the pay-per-use model of DropBucket is cheaper if you don’t need all the fancy features.

    It’s hard to be the resiliency, speed, and scalability of S3, as you start going into the terabyte ranges the prices per Gb start dropping off.

    Testing virus scanning

    Create a text file with the following content:

    X5O!P%@AP[4\PZX54(P^)7CC)7}$EICAR-STANDARD-ANTIVIRUS-TEST-FILE!$H+H*
    

    Upload it via the UI. Wait for scan to occur and check object tags, should report the file as infected.

    Configuration

    You’ll need to update the serverless.yml file and change the service name to something unique. You’ll also want to update the ADMIN_EMAIL and WEBSITE_URL to suit your setup. I’m running DropBucket with CloudFront in front of the s3 bucket that contains the single-page application.

    Building the API

    sudo npm i serverless -g
    npm i
    

    Deploying

    Note: Before attempting to deploy you’ll need to have your AWS credentials setup in a configuration profile. AWS has excellent documentation on how to do this. The deployment script assumes that you’ve done this. Trying to deploy without it will fail while trying to deploy the client code.

    sls deploy -s STAGENAME --region REGION --aws-profile YOURAWSPROFILENAMEIFYOUAREUSINGONE
    

    ex:

    sls deploy -s dev --region us-east-1 --aws-profile ctrl-alt-del
    

    And there you go, the whole thing has been deployed with a bit of configuration and one command.

    Credits

    Virus scanning approach

    https://engineering.upside.com/s3-antivirus-scanning-with-lambda-and-clamav-7d33f9c5092e

    https://blog.truework.com/2018-07-09-s3-antivirus-lambda-function

    UI inspiration

    https://serverless-stack.com/

    File downloads

    I wanted to implement downloads in such a way as to not naviate away from the app, which was a bit tricky. To do this, I’m using the StreamSave.js library, which uses a combination of service workers, blobs, and other trickery to load the file via javascript.

    TODO

    Docs on the process for updating the virus scanning engine.

    Make object expiration configurable at upload time by creating lifecycle rules that operate on object tags? Seems easy enough…

    Visit original content creator repository
    https://github.com/marksteele/drop-bucket

  • canna

    Canna 3.7p3 をベースに fork した。https://www.nslabs.jp/patch.rhtml
    
    目標:
     - `canuum/` を削除  -- 伴って, ライセンスから GPL を削除. [済み]
     - `wchar_t` は環境によって幅が違ってポータブルではない。`_WCHAR_T`, `CANNA_NEW_WCHAR_AWARE`, `CANNA_WCHAR16` は無視して, `uint16_t` 決め打ち. 内部コードはEUC-JP. [済み]
     - `lib/RKindep/cksum.c` に4条項BSDライセンス (宣伝条項付き) が適用されていた。ファイルを FreeBSD 由来に入れ替え, 3条項BSDライセンス (MITライセンスと同等) に変更. [済み]
     - `ENGINE_SWITCH` マクロ, `lib/canna/engine.c` 削除. See `misc/engine.cpp`. cannaserver or irohaserver / jserver (Wnn4) / sj3serv (SJ3) の切り替え。すでに正常に動いていない。
     - imake から autoconf & automake に変更.
       ビルドは通ったが、全然ちゃんと動かない。順にテスト中. See test/README.md
     - Windows にポーティング


                  CANNA Version 3.7p3, a Japanese input system
    
                                 Canna Project
    		https://ja.osdn.net/projects/canna/
    
    0. Preface
    
           This file describes the introduction of Canna.  For
      installation of Canna or changes from the previous versions of
      Canna, see the file `INSTALL' or `CHANGES.jp' respectively. (Sorry,
      but `INSTALL' and `README' may not be updated compared to the files
      written in Japanese.  Also sorry that `CHANGES' is provided only in
      Japanese.)
    
    1. Overview
    
           This directory includes files which are source codes for a
      Japanese input system named Canna.  Canna provides a unified user
      interface for Japanese input.
    
      *Note:  Canna was called Iroha among developers of Canna
              previously. 
    
           There exists a commonly usable Japanese input system called
      Wnn.  Canna gives an alternative Japanese input system.
    
           Canna is based on a client-server model for kana-to-kanji
      conversion, that is, an application program which uses a Japanese
      input system communicates with a kana-to-kanji conversion server,
      which is a separate process from the application program.  Canna has
      several features as follows:
    
      1) Based on client-server model kana-to-kanji conversion
      2) Supporting automatic kana-to-kanji conversion
      3) Providing a unified user interface to input Japanese
      4) Supporting customization by users
      5) Based on lisp language customization
      6) A mechanism to add a suitable part of speech to each registered
         words by users
      7) Providing a library which supports a unified user interface
      8) Maintenance tools for conversion dictionaries
      9) A customizing tool which supports easy customization
     10) Supporting Nemacs(Mule), kinput2 and uum
    
           Below, we would like to describe details of Canna's features.
    
    2. Features of Canna
    
    2.1 Based on client-server model kana-to-kanji conversion
    
           Canna converts kana to kanji based on a client-server model.
      That is, an application program communicates with a kana-to-kanji
      conversion server to achieve Japanese input.
    
    2.2 Supporting automatic kana-to-kanji conversion
    
           Canna is the first free Japanese input system which supports
      automatic kana-to-kanji conversion which based on client-server
      model.  Generally, it is not easy to operate Japanese with automatic
      kana-to-kanji conversion in PC environment.  However, Canna makes it
      easier for supporting better user interface which extended their
      generally(unautomatically) conversion.
    
    2.3 Providing a unified user interface to input Japanese
    
           Developers of Canna used to use Egg on Nemacs when we had to
      input Japanese.  Egg was very harmonious with Nemacs and its user
      interface was convenient.
    
      *Note: Nemacs is a Japanese version of Emacs.  Egg is an interface
             between Nemacs and Wnn.  Egg provides a user interface by
             itself.
    
           On the other hand, if we had to input Japanese without Nemacs,
      for example, to input Japanese in command line of shell, we were not
      able to use Egg because Egg was usable only in Emacs environment.
      On the other hand, there is also a Japanese input system for TTYs
      called Uum, Uum has a different user interface from Egg and we did
      not become accustomed with it.
    
           Especially in using X clients, we were eager to use Egg's user
      interface to use them.  We found a lot of good tools on the X window
      system such as xmh and xcalendar.  Our desire was to localize those
      clients into our national language and to operate them with Egg's
      user interface.
    
    <<Let's create another Egg by ourselves>>
    
           Thus, we decided to create an Egg like system and to provide it
      in a library.  This is the Canna.  Now, Canna provides more features
      than Egg.  Canna can be used in Emacs, in X environments, and also
      on TTYs.
    
    2.4 Supporting customization by users
    
           As well as key binding, it is possible to customize
      romaji-to-kana conversion rules, status describing strings,
      dictionaries, etc.  A customization is described in a customization
      file.  A customization file can be shared among applications using
      Canna.
    
    2.5 Based on lisp language customization
    
           Canna used to use a simple syntax for a customization file.
      But once a new function is introduced to the syntax of the
      customization file, old application programs will have to be
      re-written to incorporate the new rules and conditions of Canna.
    
           According to use new customization syntax based on lisp
      language, it is possible to ignore the descriptions which old
      version's Canna cannot understand.  With new syntax, you can get
      version of Canna or connected server, and it is also possible to
      customize on conditions of these versions.
    
    2.6 A mechanism to add a suitable part of speech to each registered
        words by users
    
           When we made our own user interface, we added one new idea into
      the word registration part of Canna.
    
           In kana-to-kanji conversion system, more detailed parts of
      speech are used than what are used in school grammars.  Canna uses
      almost 400 parts of speech.  On the other hand, it might be almost
      impossible and unkind to ask users what kind of a part of speech
      must be used for the registered word.
    
           In Canna, we made a new mechanism to add a suitable part of
      speech to registered words.  Canna shows several sentences using
      newly registered word, and ask user the usage is correct or not.
      Asking several questions to user helps Canna to decide what part of
      speech is suitable for the newly registered word.
    
    2.7 Providing a library which supports a unified user interface
    
           A user-interface library is provided.  With this library,
      programmers can easily add a Japanese input system with unified user
      interface to application programs.
    
           This library has higher-level functions than those Wnn's
      high-level library has, and interpretation of each input key is also
      processed inside of this library.
    
           An interface to this library is simple.  Giving input key to
      this library returns several pieces of information to display
      pre-edit status.  Interpretations of key functions are hidden inside
      of this library, and it is not necessary for application programs to
      be conscious of them.
    
           This library meets the case of treating inputs from several
      windows.  By giving context identifiers which correspond to each
      window with key inputs to this library makes it possible to process
      plural kana-to-kanji conversion concurrently in a process.
    
    2.8 Maintenance tools for conversion dictionaries
    
           Canna provides more than ten tools to maintain kana-to-kanji
      conversion dictionaries.  Using these tools, you can do the
      following things.
    
       - Conversion between text format dictionaries and binary format
         ones.
       - Creating, deleting, listing, renaming dictionaries by remote
         operation
       - Uploading and downloading dictionaries
       - Adding/deleting items to/from a dictionary by a batch procedure
    
    2.9 A customizing tool which supports easy customization
    
           In place of editing a customization file directly, it is
      possible to set up customization by using a customizing tool.
    
    2.10 Supporting Nemacs(Mule), kinput2 and uum
    
           Canna provides a patch for Nemacs(Mule), which makes
      Nemacs(Mule) possible to input Japanese in Canna's unified user
      interface.  And, after Mule 0.9.5, the distribution of Mule includes
      interface to Canna.
    
           If kinput2 use Canna as kana-to-kanji conversion engine,
      application programs which use kinput can use Canna's unified user
      interface to input Japanese
    
           Additionally, Canna supports a patch for uum, which makes
      possible to input Japanese in Canna on TTYs.  For uum, see
      canuum/README.jp.  (Sorry, but canuum/README.jp is in Japanese.)
    
    3.  Contents of Canna
    
           Canna contains the following things.
    
       - Kana-to-kanji conversion server (cannaserver)
       - User interface library (libcanna.a, libcanna.so.1)
       - Remote version of dictionary accessing library (libRKC.a)
       - Local version of dictionary accessing library (libRK.a)
       - Maintenance tools for conversion dictionaries
       - Patch files for uum of Canna version
       - A sample program
    
    4. Documents
    
           Under this directory, there are several documents.  Most of
      them are in Japanese.
    
      1) Document of Canna (in Japanese)
    
           The document is in jlatex format and is in doc/man/guide.
      This document describes the general comments of how to use Canna.
    
      2) Documents for commands
    
           The documents are in man macro format of roff and are in the
      respective directory.  Source codes are also available in same
      directory.  Japanese documents have suffix .jmn, and English have
      .man.
    
      3) Documents for application interface library
    
           The documents are in man macro format of roff and are in
      lib/canna and lib/RK.
    
      4) Document for kana-to-kanji conversion protocol (in Japanese)
    
           The document is in jlatex format and is in doc/intern.  Canna
      has the protocol versions 1.0, 1.1, 2.0, 2.1, 3.0 and 3.2.  The
      document of the protocol version 1.0 and 1.1 is the file
      proto12.tex.  Other version's document is protocol.tex.
    
      5) Document for lisp language of customization file (in Japanese)
    
           The document is in jlatex format and is in doc/lisp as
      canlisp.tex.
    
      6) Document for uum of Canna version
    
           The notes is in text file format and is in canuum as README.jp.
    
      7) Other Documents
    
           The documents are in jlatex format and are in doc/misc.
    
    5. Bugs
    
           Canna have some bugs as follows:
    
      (1) Canuum doesn't run on Solaris 2.1.
    
      (2) Canuum doesn't run on SunOS 4.2 with compiler gcc.
    
      (3) On SONY NEWS, the terminal mode on pseudo tty is different which
          make by canuum.
    
      (4) No English documents as follows:
            canuum/canuum.man
    
      (5) When using automatic kana-to-kanji conversion, you sometimes can
          not convert correctly.
    
      (6) On Solaris 2.3, you will have some cores.
    
      (7) When you compile, you will have a warning message "Undefined row
          vectors: BM".  Don't worry it.


    Visit original content creator repository
    https://github.com/netsphere-labs/canna

  • FilterableLayoutAddon

    Published on Vaadin Directory Stars on vaadin.com/directory Build Status Javadoc

    Filterable Layout Add-on for Vaadin 14+

    Filterable Layout is an extension for Vaadin 14+, that allows you to build forms that can be filtered to only display components with a certain caption.

    Online demo

    Online demo here

    Download release

    Available in Vaadin Directory

    Building and running demo

    • git clone repository
    • mvn clean install jetty:run

    To see the demo, navigate to http://localhost:8080/

    Release notes

    • Version 2.0.0 Initial release for Vaadin 14+ NPM mode

    Roadmap

    • Support for more container components

    Issue tracking

    The issues for this add-on are tracked on its github.com page. All bug reports and feature requests are appreciated.

    Contributions

    Contributions are welcome, but there are no guarantees that they are accepted as such. Process for contributing is the following:

    • Fork this project
    • Create an issue to this project about the contribution (bug or feature) if there is no such issue about it already. Try to keep the scope minimal.
    • Develop and test the fix or functionality carefully. Only include minimum amount of code needed to fix the issue.
    • Refer to the fixed issue in commit
    • Send a pull request for the original project
    • Comment on the original issue that you have implemented a fix for it

    License & Author

    This add-on is distributed under Apache License 2.0. For license terms, see LICENSE.txt.

    AppLayout is written by Flowing Code S.A.

    Developer Guide

    Getting started

    Instantiating

        VerticalLayout vl = new VerticalLayout();
    	...
    	TextField filter = createTextField("Filter");
    	FilterableLayoutExtension flayout = new FilterableLayoutExtension(filter, vl.getElement());
    

    Adding a filtered style

    	flayout.setFilteredStyleName("filtered");
    

    Configuring it to hide or not filtered components

    	Checkbox cb = new Checkbox("Hide filtered components");
    	cb.setValue(true);
    	cb.addValueChangeListener(e -> {
    		flayout.setHideFilteredComponents(e.getValue());
    		flayout.filterComponents(filter.getValue(), vl.getElement());
    	});
    
    Visit original content creator repository https://github.com/FlowingCode/FilterableLayoutAddon
  • SilkMelody

    Silk Melody

    Summary

    A bootleg game.

    Status: Probably dropped. I want to try new things.

    Unity version: 2021.1.18f1.

    Table of contents

    Demo images

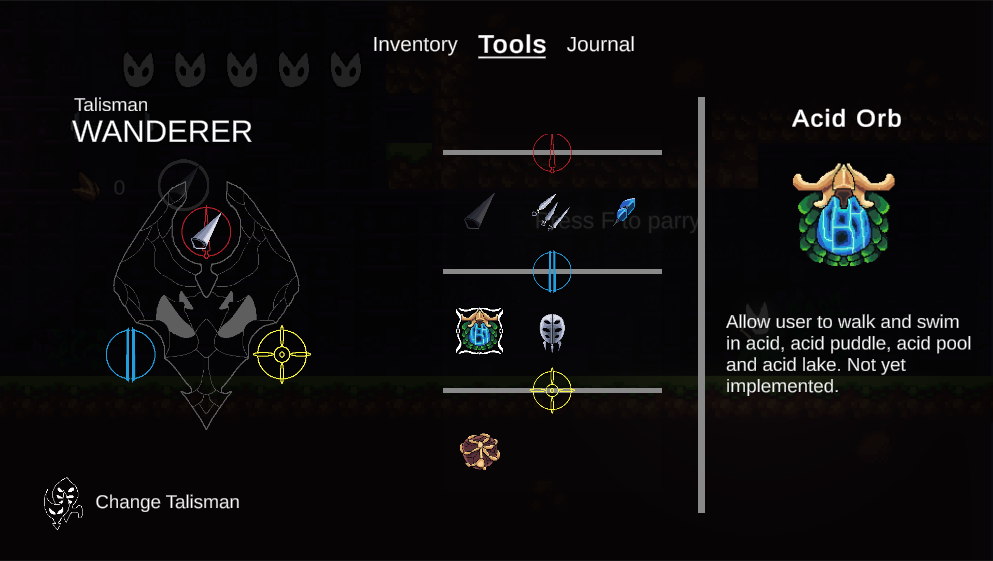
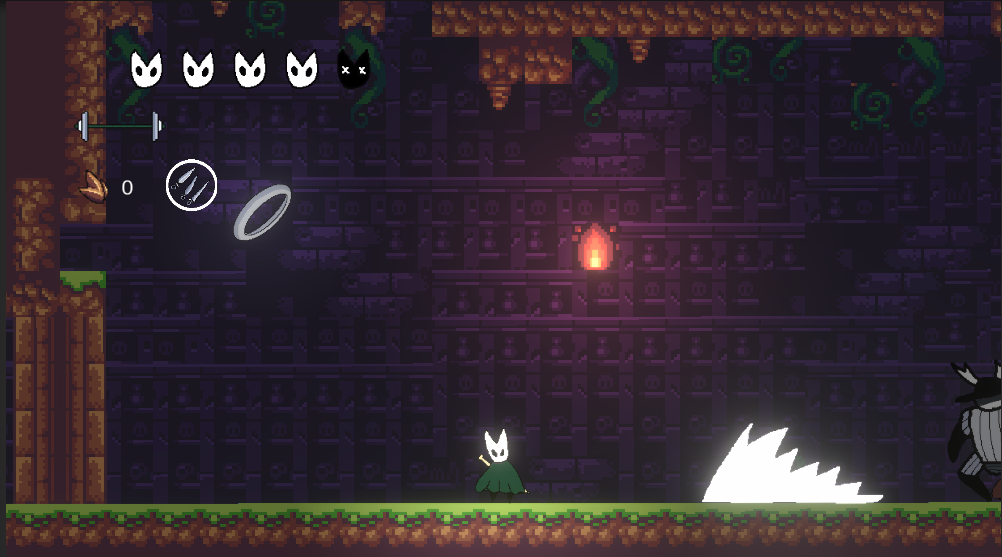
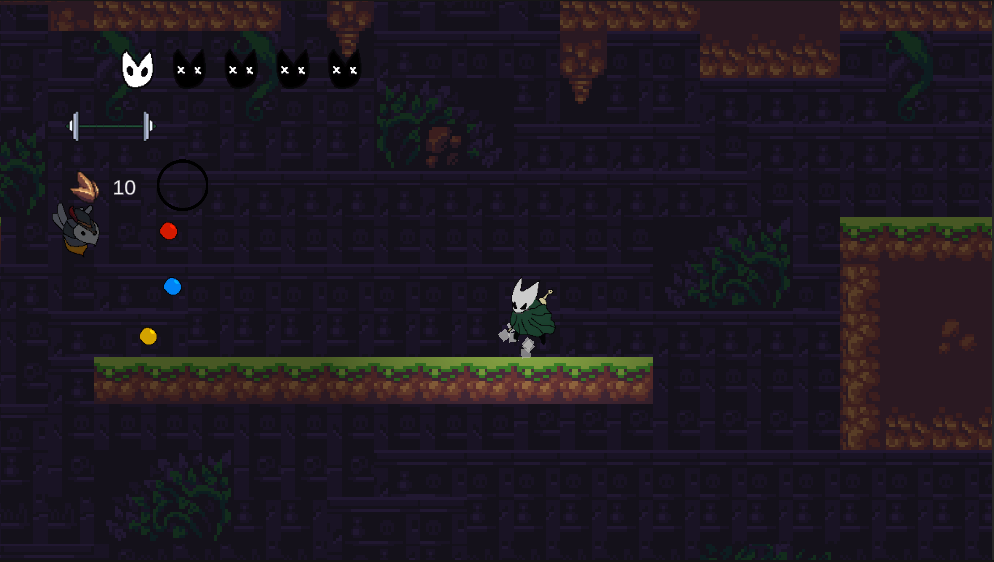
    demo_image0 demo_image1 demo_image2 demo_image3

    Control

    Jump near ledge to grab them.

    Hold Jump to jump higher.

    Attack while holding up arrow to do an upward attack.

    Attack while holding down arrow and midair to do an pogo attack.

    Silk skill:

    • No vertical input: Heal 3HP. Cost 8 silk.

    • Up input (press silk skill while holding up): Gossamer Storm. Cost 6 silk.

    • Down input: Silk Burst projectile. Cost 4 silk.

    Keyboard

    • X – Jump.
    • Q – Silk skill
    • F – Parry
    • C – Attack
    • Z – Dash
    • V – Use tools
    • I – Open inventory

    Xbox

    • A – Jump
    • X – Attack
    • B – Silk skill
    • Y – Parry
    • RT – Dash
    • LB – Use tools
    • Start – Menu

    Get the Demo

    Option 1: Check the Release tab

    Here you will find the version of the game that is stable, mostly bug-free and is updated when the game development reaches certain milestone. The version is put up by the author themself.

    Option 2: Get the Nightly Build

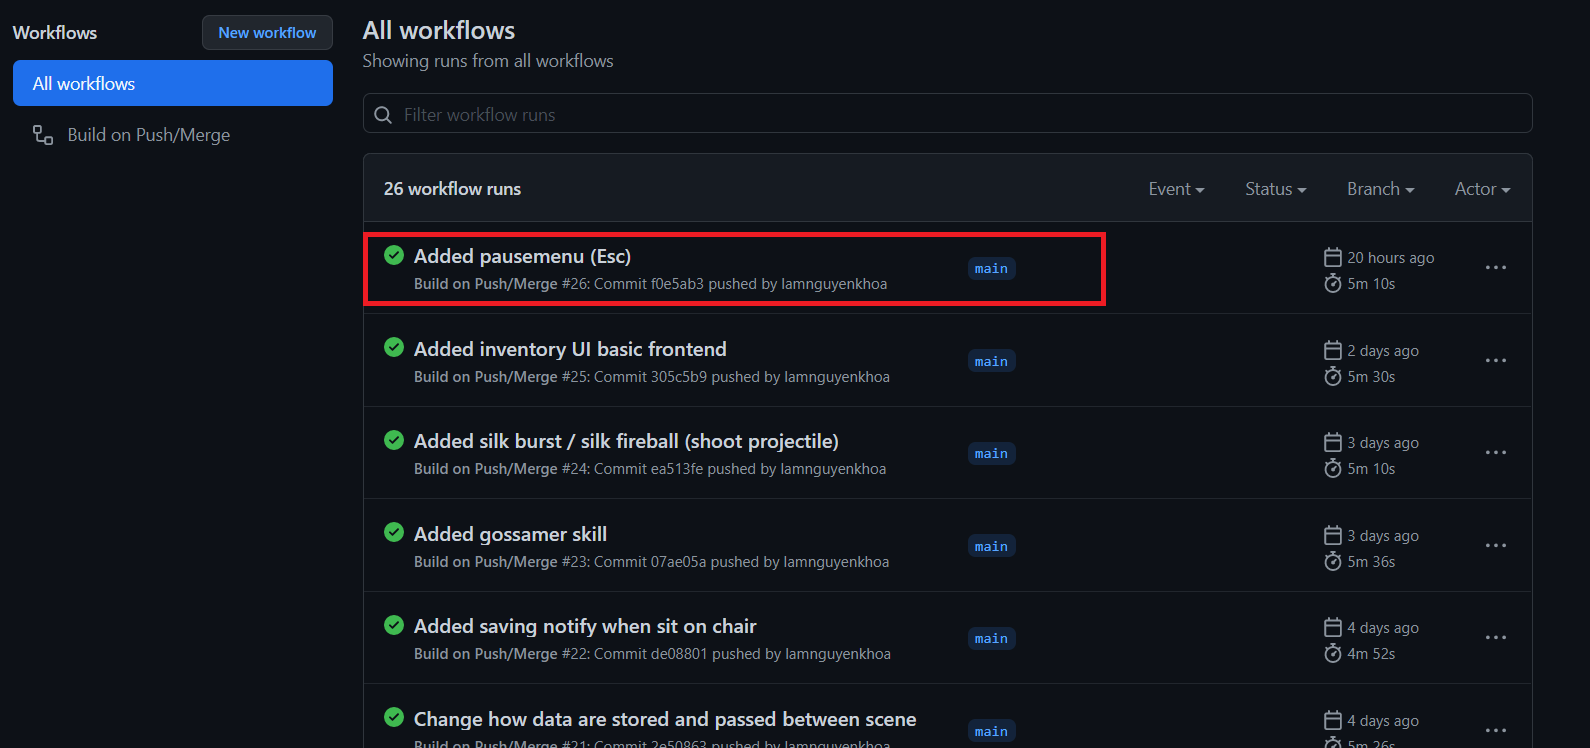
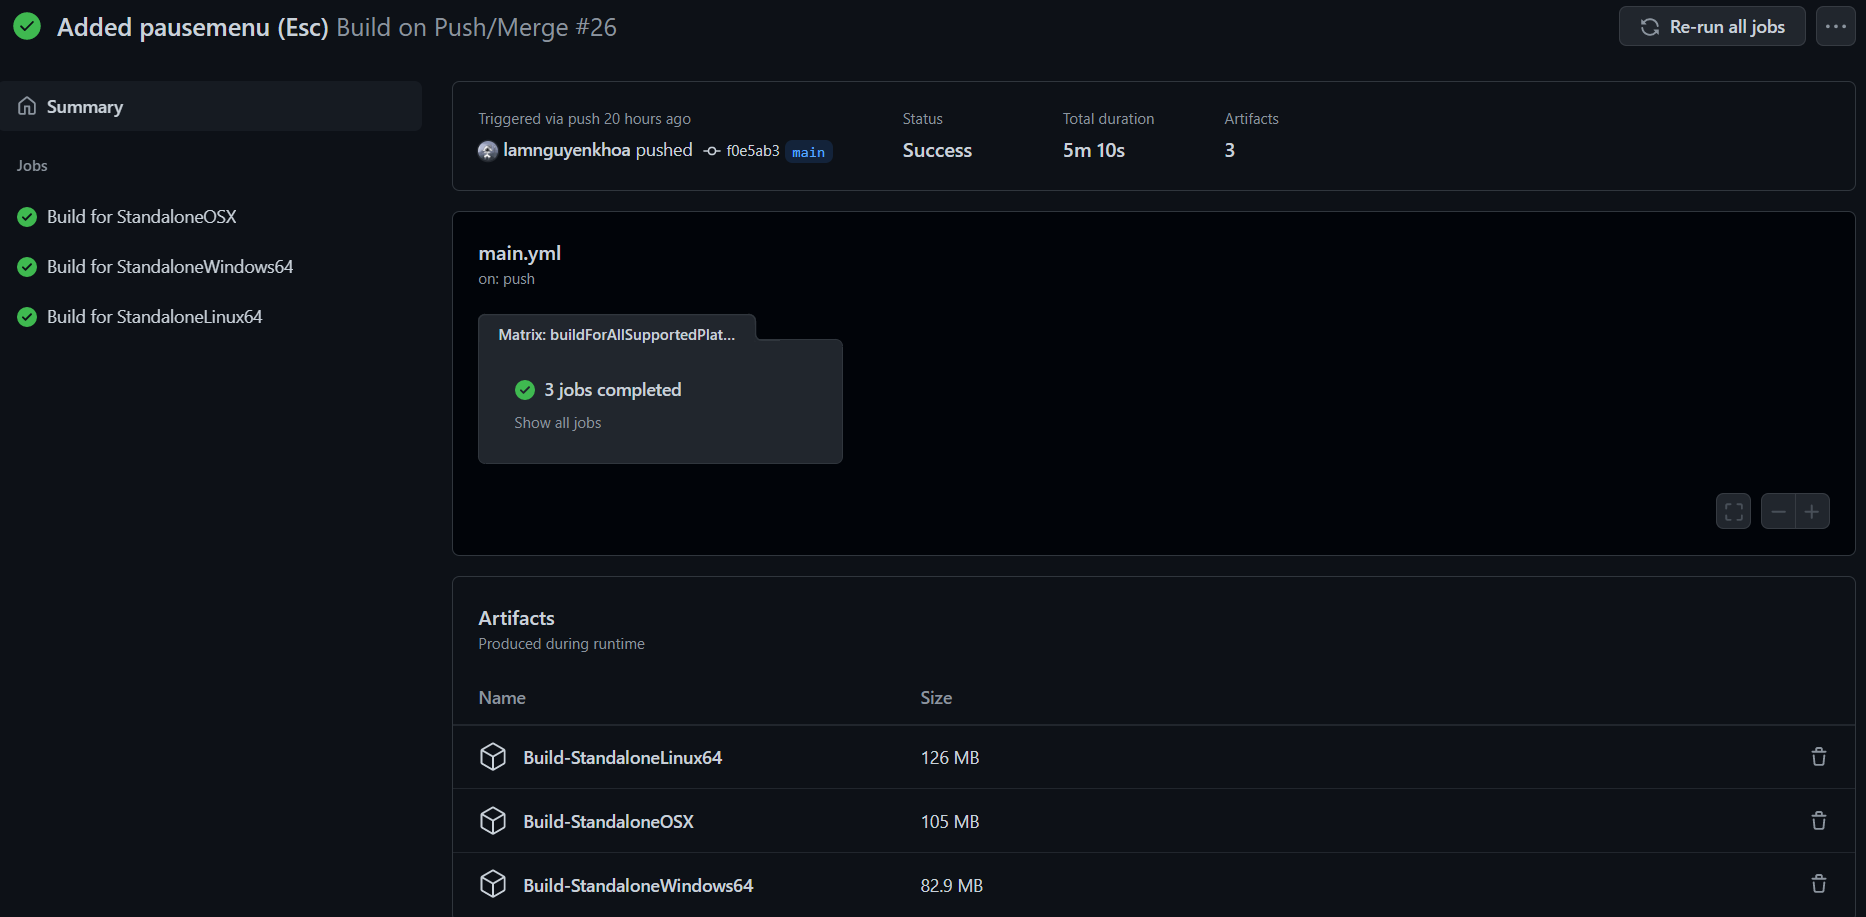
    Navigate to the Actions tab of the repo, here you will find a list of all the builds’ result, each build takes place when a code push happens, so you can try out the new changes, or browse previous builds. image Let’s assume you want the lastest build, click on the first one from top to bottom with the green checkmark. It will bring you to the Action's result page, here you can find builds for various systems that will suit your needs. image

    Design document

    Trello link: https://trello.com/b/y4U81oTS/silkmelody

    Map diagram: https://drive.google.com/file/d/1FNvQ1Rmx9jhIjlrh_A7A3vSlKeX5K8J0/view?usp=sharing

    Packages used

    • Cinemachine
    • InputSystem
    • URP
    • A* Pathfinding

    Resources

    Visit original content creator repository https://github.com/lamnguyenkhoa/SilkMelody
  • quart_borg

    Quart Borg: Quarto slide theme for Reveal.js

    This Mork Borg-inspired slide theme was built for Quarto users to build Reveal.js slides with the color scheme from an unhealthily apocalyptic and metal tabletop role-playing game.

    The theme started as a joke and got out of hand. See, I saw Emil Hvitfeldt’s posit::conf talk on building custom slide templates and decided to try it out. Eventually the Mork Borg visual scheme came to mind and I had a good inner-laugh. And laughed some more. And started building it.

    You have four versions of the theme to choose from:

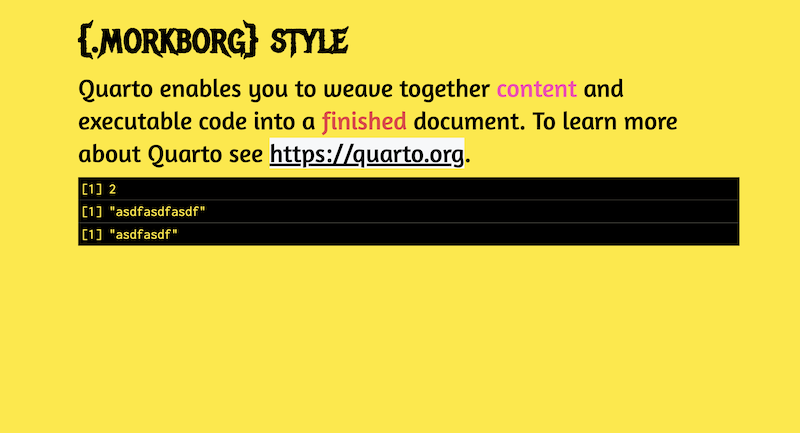
    • {.morkborg}: Black on yellow
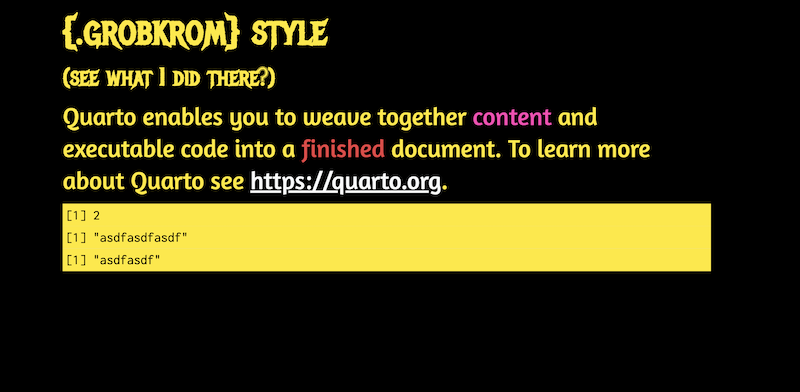
    • {.grobkrom}: Yellow on black (Get it? Because it’s morkborg backwards?)
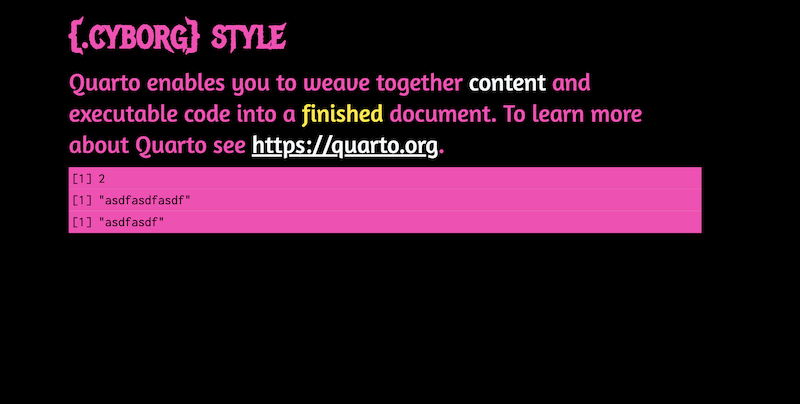
    • {.cyborg}: Black on pink
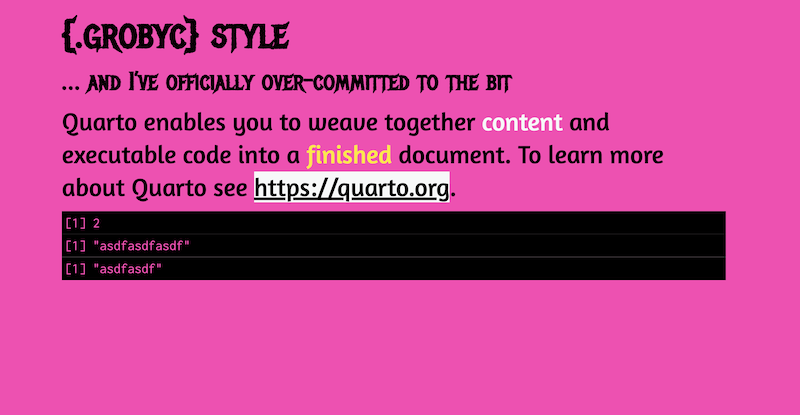
    • {.grobyc}: Pink on black (Really phoned in that name)

    Each has a matching title slide style

    • {.morkborg-title-slide}
    • {.grobkrom-title-slide}
    • {.cyborg-title-slide}
    • {.grobyc-title-slide}

    Now let’s be perfectly clear: You really shouldn’t use this template. It’s actually quite jarring and obnoxious, but it’s also still kind of tempting to show off.

    But you shouldn’t. I mean, it’s not 100% colorblind friendly.

    But you still wanna. Even though it could leave you or your audience with some eye strain.

    Yet you’re still considering using it. Do you hate this audience?

    To apply a theme — I can’t believe you’re seriously considering this — append one of the above tags at the end of your slide title. Hit Render and it should show up.

    How to install

    This Quarto extension can be installed against one’s better judgment using the following command:

    quarto install extension morrisLuke/quart_borg

    If you are unable to install Quarto extensions, you probably should update Quarto.

    How to use it

    If you’ve gotten this far, I genuinely have to ask: Who hurt you?

    After you install the template, use the following code on terminal to create a new directory with all files needed:

    quarto use template morrisLuke/quart_borg

    Then, please seek help.

    Visit original content creator repository https://github.com/morrisLuke/quart_borg
  • project-mulla

    Coverage Status Build Status

    What MPESA G2 API should have been in the 21st century.

    PLEASE NOTE: Mediates only C2B portion for now.

    Project Mulla is a MPESA API RESTful mediator. It lets you make familiar HTTP REST requests, transforming your requests to the fiddling dreaded SOAP/XML requests that the Safaricom MPESA G2 API only understands. It then communicates with the MPESA API gateway, transforming all SOAP responses from the SAG to RESTful JSON responses that you then consume effortlessly.

    In short, it’ll deal with all of the SOAP shenanigans while you REST. Everybody wins!

    The aim of Project Mulla is to create a REST API middleman that interfaces with the MPESA G2 API for you.

    Important: Update 23-06-2017

    When one now pings the endpoint /payment/request it initializes the payment and on response confirms the payment by also hitting the endpoint payment/confirm automatically

    This means you no longer have to make a second call to Project Mulla to confirm the payment thus hitting up the user’s phone with the USSD prompt. One call to payment/request should handle this automatically.

    Instructions

    Request Payment

    This initial step is to tell the SAG to initialise a payment transaction for you. After initialisation, you then make another request to the SAG as a confirmation signaling the SAG to process the payment request.

    Assuming Project Mulla is now your mediator, you’d now make a POST request to Project Mulla. Not the Safaricom Access Gateway.

    See below how you’d make this initial request:

    Initiate Payment Request:

    POST https://project-mulla-companyname.herokuapp.com/api/v1/payment/request

    Body Parameters:

    • phoneNumber – The phone number of your client
    • totalAmount – The total amount you are charging the client
    • referenceID [optional] – The reference ID of the order or service
    • merchantTransactionID [optional] – This specific order’s or service’s transaction ID

    NOTE: If merchantTransactionID or referenceID are not provided a time-based and random UUID is generated for each respectively.

    Sample request using CURL in the command line/terminal:

    $ curl -i -X POST \
    --url http://project-mulla-companyname.herokuapp.com/api/v1/payment/request \
    --data 'phoneNumber=254723000000' \
    --data 'totalAmount=45.00' \
    --data 'clientName="Eugene Mutai"' \
    --data 'clientLocation=Kilimani' \

    Expected Response

    If all goes well you get HTTP status code 200 accompanied with a similar structured JSON response:

    {
      "response": {
        "return_code": "00",
        "status_code": 200,
        "message": "Transaction carried successfully",
        "trx_id": "453c70c4b2434bd94bcbafb17518dc8e",
        "description": "success",
        "cust_msg": "to complete this transaction, enter your bonga pin on your handset. if you don't have one dial *126*5# for instructions",
        "reference_id": "3e3beff0-fc05-417a-bbf2-190ee19a5e58",
        "merchant_transaction_id": "95d64500-2514-11e6-bcb8-a7f8e1c786c4",
        "amount_in_double_float": "45.00",
        "client_phone_number": "254723001575",
        "extra_payload": {},
        "time_stamp": "20160528234142"
      }
    }

    Next step: confirmation

    You are to use trx_id or merchant_transaction_id to make the confirmation payment request. The confirmation request is to authorize the SAG to process the payment request. On confirmation, it triggers a pop up on your client’s mobile phone to complete the payment.

    Find the complete documentation here

    Installation

    Installing Project Mulla is easy and straight-forward, but there are a few requirements you’ll need to make sure your system has before you start.

    Requirements

    You will need to install some stuff, if they are not yet installed in your machine:

    If you’ve already installed the above you may need to only update npm to the latest version:

    $ sudo npm update -g npm

    Install through Github

    Best way to install Project Mulla is to clone it from Github

    To clone/download the boilerplate

    $ git clone https://github.com/kn9ts/project-mulla.git

    After cloning, get into your cloned Project Mulla’s directory/folder

    $ cd project-mulla

    Install all of the projects dependencies with:

    $ npm install

    Create app.yaml configurations file

    The last but not the least step is to create a app.yaml file with your configurations in the root directory of project-mulla.

    This is the same folder directory where index.js can be found.

    Your app.yaml should look like the example below, only with your specific configuration values:

    env_variables:
      PAYBILL_NUMBER: '898998'
      PASSKEY: 'a8eac82d7ac1461ba0348b0cb24d3f8140d3afb9be864e56a10d7e8026eaed66'
      MERCHANT_ENDPOINT: 'http://merchant-endpoint.com/mpesa/payment/complete'
    
    # Everything below is only relevant if you are looking
    # to deploy Project Mulla to Google App Engine.
    runtime: nodejs
    vm: true
    
    skip_files:
      - ^(.*/)?.*/node_modules/.*$

    NOTE: The PAYBILL_NUMBER and PASSKEY are provided by Safaricom once you have registered for the MPESA G2 API.

    NOTE: The details above only serve as examples

    Testing

    It’s now ready to launch

    First run the command npm test on your terminal and see if everything is all good. Then run:

    $ npm start
    
    > project-mulla@0.1.1 start ../project-mulla
    > node index.js
    
    Your secret session key is: 5f06b1f1-1bff-470d-8198-9ca2f18919c5
    Express server listening on 8080, in development mode

    Do a test run

    Now make a test run using CURL:

    $ curl -i -X POST \
      --url http://localhost:8080/api/v1/payment/request \
      --data 'phoneNumber=254723000000' \
      --data 'totalAmount=10.00' \
      --data 'clientName="Eugene Mutai"' \
      --data 'clientLocation=Kilimani' \

    Or if you have httpie installed:

    $ http POST localhost:8080/api/v1/payment/request \
      phoneNumber=254723000000 \
      totalAmount=10.00 \
      clientName='Eugene Mutai' \
      clientLocation='Kilimani'

    Once the request is executed, your console should print a similar structured response as below:

    HTTP/1.1 200 OK
    Connection: keep-alive
    Content-Length: 534
    Content-Type: application/json; charset=utf-8
    Date: Sun, 22 May 2016 13:12:09 GMT
    ETag: W/"216-NgmF2VWb0PIkUOKfya6WlA"
    X-Powered-By: Express
    set-cookie: connect.sid=s:iWfXH7rbAvXz7cYgmurhGTHDn0LNBmNt; Path=/; HttpOnly
    
    {
      "response": {
        "return_code": "00",
        "status_code": 200,
        "message": "Transaction carried successfully",
        "trx_id": "453c70c4b2434bd94bcbafb17518dc8e",
        "description": "success",
        "cust_msg": "to complete this transaction, enter your bonga pin on your handset. if you don't have one dial *126*5# for instructions",
        "reference_id": "3e3beff0-fc05-417a-bbf2-190ee19a5e58",
        "merchant_transaction_id": "95d64500-2514-11e6-bcb8-a7f8e1c786c4",
        "amount_in_double_float": "10.00",
        "client_phone_number": "254723001575",
        "extra_payload": {},
        "time_stamp": "20160528234142"
      }
    }

    This project uses GPLv3 LICENSE

    TL;DR Here’s what the license entails:

    1. Anyone can copy, modify and distribute this software.
    2. You have to include the license and copyright notice with each and every distribution.
    3. You can use this software privately.
    4. You can use this software for commercial purposes.
    5. If you dare build your business solely from this code, you risk open-sourcing the whole code base.
    6. If you modify it, you have to indicate changes made to the code.
    7. Any modifications of this code base MUST be distributed with the same license, GPLv3.
    8. This software is provided without warranty.
    9. The software author or license can not be held liable for any damages inflicted by the software.

    More information on the LICENSE can be found here

    DISCLAIMER: All opinions aired in this repo are ours and do not reflect any company or organisation any contributor is involved with.

    Visit original content creator repository https://github.com/kn9ts/project-mulla
  • transformers

    Visit original content creator repository
    https://github.com/epfl-dlab/transformers

  • transformers

    Visit original content creator repository
    https://github.com/epfl-dlab/transformers

  • Flask-SQLAlchemy-Guide

    Flask-SQLAlchemy Comprehensive Guide Repository

    This repository provides a structured and detailed guide on using Flask-SQLAlchemy to manage models and interact with databases in Flask applications. The goal is to share knowledge about different attributes, column options, and best practices.


    Project Structure

    flask-sqlalchemy-guide/
    ├── README.md                # Project overview and introduction
    ├── setup/                    # Environment setup instructions
    │   └── environment.md
    ├── models/                   # Guides on defining models
    │   ├── basic-models.md       # Basic model creation
    │   ├── column-attributes.md  # Column options and attributes
    │   ├── relationships.md      # Defining relationships (One-to-Many, Many-to-Many)
    │   └── validations.md        # Model constraints and validation
    ├── database/                 # Database creation and management
    │   ├── creating-tables.md    # How to create tables
    │   └── migrations.md         # Database migrations with Flask-Migrate
    └── examples/                 # Practical examples and best practices
        ├── simple-app/           # Simple Flask app with SQLAlchemy
        └── advanced-features/    # Advanced configurations
    

    1. Setting Up the Environment

    Instructions to set up the environment:

    • Installing Flask-SQLAlchemy
    • Creating a virtual environment
    • Connecting to different databases

    Example Configuration:

    from flask import Flask
    from flask_sqlalchemy import SQLAlchemy
    
    app = Flask(__name__)
    app.config['SQLALCHEMY_DATABASE_URI'] = 'sqlite:///database.db'
    app.config['SQLALCHEMY_TRACK_MODIFICATIONS'] = False
    
    db = SQLAlchemy(app)

    2. Defining Models

    Basic structure of defining models and mapping them to tables.

    Example:

    class User(db.Model):
        id = db.Column(db.Integer, primary_key=True)
        name = db.Column(db.String(80), nullable=False)
        email = db.Column(db.String(120), unique=True, nullable=False)

    Comprehensive list of column attributes:

    • Data Types: db.Integer, db.String, db.Float, db.Boolean, etc.
    • Common Options:
      • primary_key=True
      • nullable=False
      • unique=True
      • default=value

    Example:

    price = db.Column(db.Float, default=0.0, nullable=False)
    created_at = db.Column(db.DateTime, default=db.func.now())

    Guide on creating relationships between tables:

    • One-to-Many
    • Many-to-Many

    Example:

    class Post(db.Model):
        id = db.Column(db.Integer, primary_key=True)
        user_id = db.Column(db.Integer, db.ForeignKey('user.id'))
        user = db.relationship('User', backref='posts')

    How to apply model-level constraints and validation.


    3. Database Management

    Steps to create tables and manage the database lifecycle.

    Creating Tables:

    with app.app_context():
        db.create_all()

    How to handle migrations using Flask-Migrate.


    4. Examples and Best Practices

    A minimal example of a Flask app with a User model.

    Examples demonstrating advanced configurations such as:

    • Custom Query Methods
    • Database Indexing
    • Performance Optimization

    How to Contribute

    Feel free to open issues or submit pull requests to improve this guide.


    License

    MIT License

    Visit original content creator repository
    https://github.com/jaimin-bariya/Flask-SQLAlchemy-Guide

  • ssl_logger

    Visit original content creator repository
    https://github.com/zx1340/ssl_logger