Chatbot for Telegram platform that pulls every link it receives and saves it in a Google Drive spreadsheet to build a knowledge database and share it with the rest of your team.
The purpose of this chatbot is to take advantage of the already existing information sharing platforms in your team by gathering all the juicy articles and creating a knowledge repository from where you can choose to share to social media, internally or just save them for later.
Installation / Development setup
Run this in a terminal:
git clone https://github.com/joamadorrr/article-meeseeks.git

cd article-meeseeks

cp .env.example .env
We just created a file with all the environment variables you will require:
BOT_TOKEN: Once you’ve created your bot, talk to the BotFather and ask him for your bot’s token
SHEETS_SCOPE: Unles you want to do something weird, leave the default
RANGE_NAME: Read the A1 notation part in the link above
If you are setting up a development environment I highly recommend you use pipenv. Otherwise, you can install the requirements from the requirements.txt file.
Pipenv
Here we create an environment for the chatbot in python 3 and copy the last version of the development environment from the pipfile.lock
After you create your new Google Sheets Project, download the configuration file and move it to the chatbot’s root folder under the name credentials.json
Usage example
When ran for the first time, the browser is opened to authenticate a google account. After the first sign in, the credentials are saved in the token.json file, so it won’t prompt the browser again.
After deployment, basically just talk to it and send him links to cool articles you wanna share with your team. A really cool feature of Telegram bots is that you can make them join group conversations, so the Article Meeseeks can infiltrate different conversations and gather articles from those too.
Release History
0.1.0
The first proper release
Environment variables support added
0.0.1
It works but a lot of things need to be enhanced before “official launch”
The simple vanilla JavaScript toast pop-up notifications module, which is fully CSS-customizable.
The solution which “just works”: add the module to your project and go further.
Supported by all major browsers. Safe to use with ReactJS and other virtual-dom frameworks.
Toaster-JS is primarily the uncompiled ES6 module. Install it with npm:
npm install toaster-js
Then, include it to your project:
import{Toast}from"toaster-js";// const { Toast } = require("toaster-js/umd.js");import"toaster-js/default.scss";// Assuming CSS/SCSS loader is present// Import styles from SCSS: @import "../node_modules/toaster-js/default.scss";// Or just copy default styles to your project from node_modules/toaster-js/default.*css. // Or draw your own styles! For instance, you can make toasts appear on the left by overwriting .toast { left: 0; right: auto; }// Simple toastnewToast("Welcome!");// Typed toast (just a matter of CSS) with timeoutnewToast("There is a lot of toasts!",Toast.TYPE_ERROR,Toast.TIME_NORMAL);// Custom toast content example (you can also add something like close buttons, etc)letelement=document.createElement("div");element.textContent="You can pass any HTML elements to Toast. Clicking on this one deletes it!";letnewToast=newToast(element,Toast.TYPE_MESSAGE);element.addEventListener("click",()=>newToast.delete());// delete a toast on message click!
You can set up additional options if you need. See the API section below for more details.
import{configureToasts,deleteAllToasts}from"toaster-js";configureToasts({topOrigin: 0,deleteDelay: 300});deleteAllToasts();// just deletes all toasts on the screen
If you need to load ES5 (UMD) module, use the following:
const{ Toast }=require("toaster-js/umd.js");
If you need to include the module with a script tag (for example, for demos), use this:
options.topOrigin = 0 – A number in pixels of toasts Y-axis origin (negative values move toasts up).
options.deleteDelay = 300 – A number representing delay in milliseconds. When toast is deleted, it stays in DOM for deleteDelay more milliseconds. Useful with CSS animations.
deleteAllToasts() – Deletes all toasts on the screen.
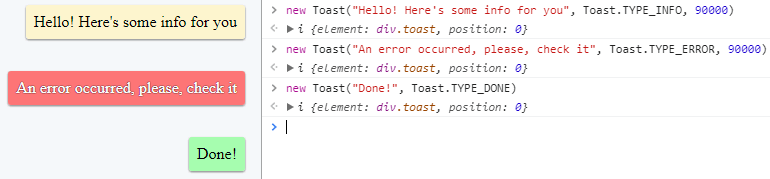
Toast(content, type, timeout)
Creates a new toast notification message on the screen. Pass a string content to specify the
message text, type = Toast.TYPE_* to specify the type and timeout = Toast.TIME_* to specify
the timeout. Timeout constants are the numbers of milliseconds for message to stay on screen. For
example, new Toast("Baked!", Toast.TYPE_ERROR, 10000) message will stay on the screen for 10
seconds.
TIME_SHORT = 2 seconds
TIME_NORMAL = 4 seconds
TIME_LONG = 8 seconds
TYPE_INFO = "info"
TYPE_MESSAGE = "message"
TYPE_WARNING = "warning"
TYPE_ERROR = "error"
TYPE_DONE = "done"
When content is a valid DOM Element, it will be attached to the message’s body directly,
allowing you to customize toast however you want.
configureToasts(options)
Allows to configure some options of the toast. The available optional options are listed below:
configureToasts({topOrigin: -100,// [default=0] Y-axis origin of the messages (better to use CSS `transform` instead).deleteDelay: 300// time until the toast is completely removed from the DOM after deleting. });
Styles
Import default toast styles from node_modules/toaster-js/default.*css (CSS, SCSS are available).
To style the toast properly, consider that toast elements (for example, info toasts) have three
states: empty state (when the toast attaches to the DOM), displayed state (when the toast is moved
to its proper position), and deleted state, when the toast “fades out” from the DOM. You can
control how much time the toast stays in deleted state until it disappears using
deleteDelay option. States:
Cog is a ChatOps platform with some really great access control features, and allows writing additional functionality in any language.
This chart is still alpha and will not include a Postgres database container until Helm includes a means of excluding dependent subcharts during deployment.
In the mean time, deploying the Postgres chart from the Kubernetes charts repository will provide a small testing database for Cog’s use.
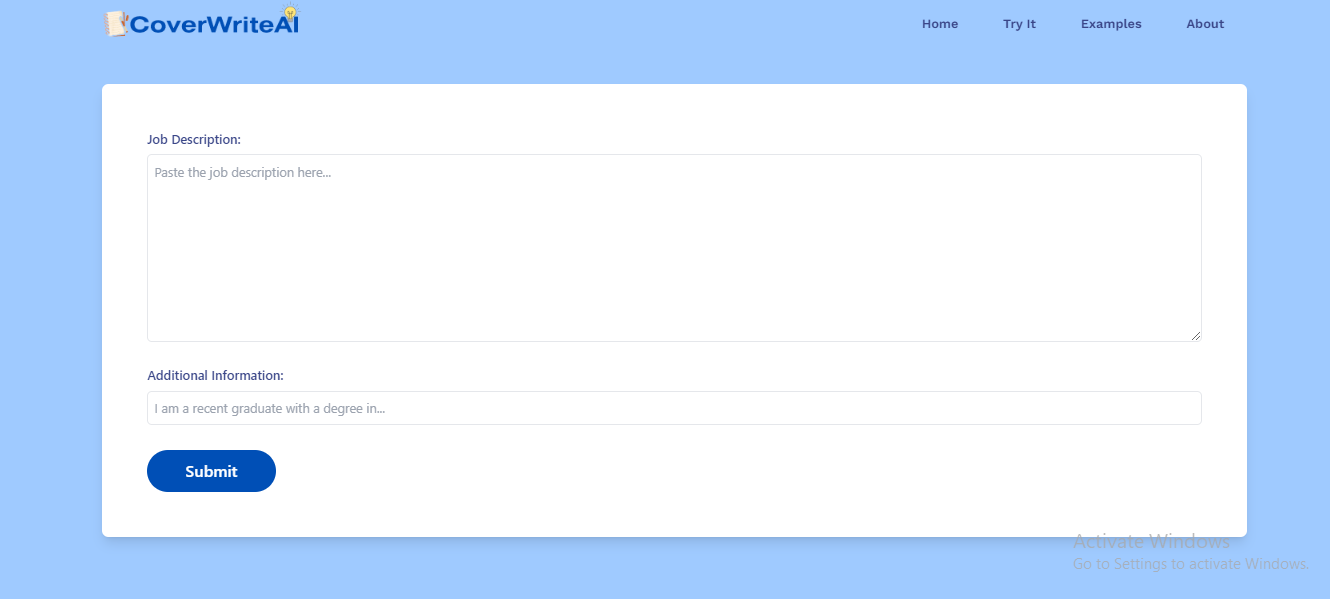
CoverWriteAI – your ultimate tool for effortlessly generating cover letters. Say goodbye to the arduous process of crafting cover letters from scratch. With CoverWriteAI you’re just a few clicks away from your perfectly tailored cover letter.
Replace the process.env.API_KEY in the server code with your own API key
constAPI_KEY=process.env.API_KEY;// Replace with your own API key gotten from makersuite
💻 Built with
Technologies used in the project:
🤝 Contributing
Contributions are welcome! To contribute to this project, follow these steps:
Create an Issue: Before starting work on a new feature, enhancement, or bug fix, it’s recommended to create a new issue. This allows for discussions and feedback on the proposed changes. Issues help ensure that your contribution aligns with the project’s goals and avoids duplication of effort.
Fork this repository.
Create a new branch: git checkout -b feature/my-feature.
Make your changes and commit them: git commit -am 'Add some feature'.
Push the changes to your fork: git push origin feature/my-feature.
Create a pull request, explaining your changes.
Please ensure that your pull request follows the project’s coding guidelines and standards.
Creating an Issue
When creating an issue, provide the following details:
A clear and descriptive title.
A detailed description of the problem or enhancement you are addressing.
Steps to reproduce (for bugs).
Any relevant code snippets or screenshots.
By following these steps and creating an issue, you help maintain a structured development process and ensure that your contributions are aligned with the project’s objectives.
This code aims at demonstrating an use of services in python-for-android, and
communication between services and a kivy front end.
That examples uses the OSC protocol for simplicity and historical reasons,
(since an implementation was shipped with kivy historically, and a better one
is now found in oscpy). The OSC protocol makes things simple because
it’s unconnected, you just send a message, and can forget about it. You bind
functions to messages you receive. It’s simple enough for a lot of things, and
avoids the burden of maintaining a connection when both the service and front
end can be restarted any time.
The app is composed of the front-end, defined in src/main.py, and the back-end defined in src/service.py.
The service (back-end):
is defined in buildozer.spec, in the services line. Following the example syntax
is started by the application at startup time, and can be stopped/restarted from the UI.
sends the current date, as a string, every tenth of a second to the UI, on a ‘/date’ address.
answers with a random string on the ‘/message’ address when a message is sent to the ‘/ping’ address on its side.
The UI (front-end):
is defined in main.py
allows stopping/restarting the backend.
displays the last received messages from the backend in a RecycleView
allow to sent a ‘/ping’ message to the backend, which will trigger a new message.
Building:
The package is built using CircleCI, you should be able to download the
latest debug apk by clicking on the “Artifacts” tab on the latest build.
This project is a template repository, so you can create your own project
from it, and setup CircleCI to build your version of it.
You can also just run the kivy/buildozer docker image to build your project from any Linux computer.
docker run -v $PWD:/project/ -w /project/ kivy/buildozer android debug
Once it’s completed, you should have a bin/ directory with the apk inside.
Retrieves white noise from the environment via the microphone and extracting the least significant bit.
Invocation (Refer to steps below for installation)
python -m noiserecorder --help
Brings up help.
python -m noiserecorder
Generates 30 minutes (The user should be warned that this will take about 8 hours [30min (desired time)*16 (number of bits per sample)=8hrs]) of noise written to a dated file.
python -m noiserecorder pathname/filename.wav
Generates 30 minutes of noise written to a specific path.
Generates specified duration of noise written to a specific path.
Virtual Environment Requirements for Building
The following packages are needed:
System Requirements
Any system that supports Python.
Android /w Termux Installed?: Don’t even try it! I am not sure that Android’s permission system will allow audio to be recorded in the manner this software does (using sounddevice). I am not so sure about the python setup there. I have had problems with it before.
Anything OS not Windows/Linux/MacOS or anything running on a processor that is not Intel-based?: YMMV/I really don’t know. (Hmm. I smell a Raspberry Pi project)
Any of the above. Try and report.
⚠️ Important Safety Tip For Android/Termux: Just in case somebody does manages to get this working on an Android phone running Termux, Please for the love of all that is Good and Holy, don’t waste your batteries, or at the very least have a friend that is not wasting their batteries when you are out in the middle of a wilderness and might get lost and need to call someone for help. Just in case gathering atmospheric noise in the middle of a desert or forest is tempting for you. I hear waterfalls are good sources of noise. Again, bring a friend with a charged phone not running this and stay safe! Remember it takes 16 seconds of recorded sound to generate 1 second of noise. Plus there is quite a bit of postprocessing at the end. I cannot be held responsible for someone getting lost or hurt and I do not want that for anybody either. So if you are going to proceed to gather noise from the wild natural environment, be thoughtful of the following: Be safe, be smart, be vigilent, and most importantly stay alive and unharmed, and are able to come back home when you are done! You have been duly warned.
🗞️ News flash for Android/Termux: Portaudio library (sounddevice’s native dependency) does not work here.
Python 3.11 w/ pip (For best results use this version: You might be able to get away with using something as low as 3.9 but I strongly recommend using this listed version if you can)
virtualenv and/or venv python pip packages.
Python Virtual Enviroment Packages (AKA don’t screw up your system’s python!)
Install a virtual environment by doing the following: [You will have to replace the ~ with $env:USERPROFILE (powershell.exe/pwsh.exe) and /’s with ‘s if you are on Windows]
In the Python Prompt do the following (One line at a time):
importosos.system('pwsh') # Start Powershell
Once in Powershell Subprocess do the following (One line at a time):
cd # Go Home
python -m venv --copies --upgrade-deps $env:USERPROFILE\path\to\noiserecorder_venv
exit
Exit Windows Store Python:
exit()
If you encounter access denied issues attempting to run python from the pwsh subshell, try this in the windows store python interactive shell (One line at a time):
# $PATH_TO_NOISERECORDER_SOURCE_MODULE is a stand-in for the actual path to your checked out copy of the noiserecorder module.
python -m pip install $PATH_TO_NOISERECORDER_SOURCE# It is the top of this project folder that contains setup.py and this Readme.md file, it is NOT the inner noiserecorder package folder that contains __init__.py and friends.
pwsh (Windows):
# $env:PATH_TO_NOISERECORDER_SOURCE_MODULE is a stand-in for the actual path to your checked out out copy of the noiserecorder module.
cd $env:PATH_TO_NOISERECORDER_SOURCE_MODULE& python -m pip install $env:PATH_TO_NOISERECORDER_SOURCE# It is the folder that contains setup.py and this Readme.md file, it is NOT the inner noiserecorder package folder that contains __init__.py and friends.