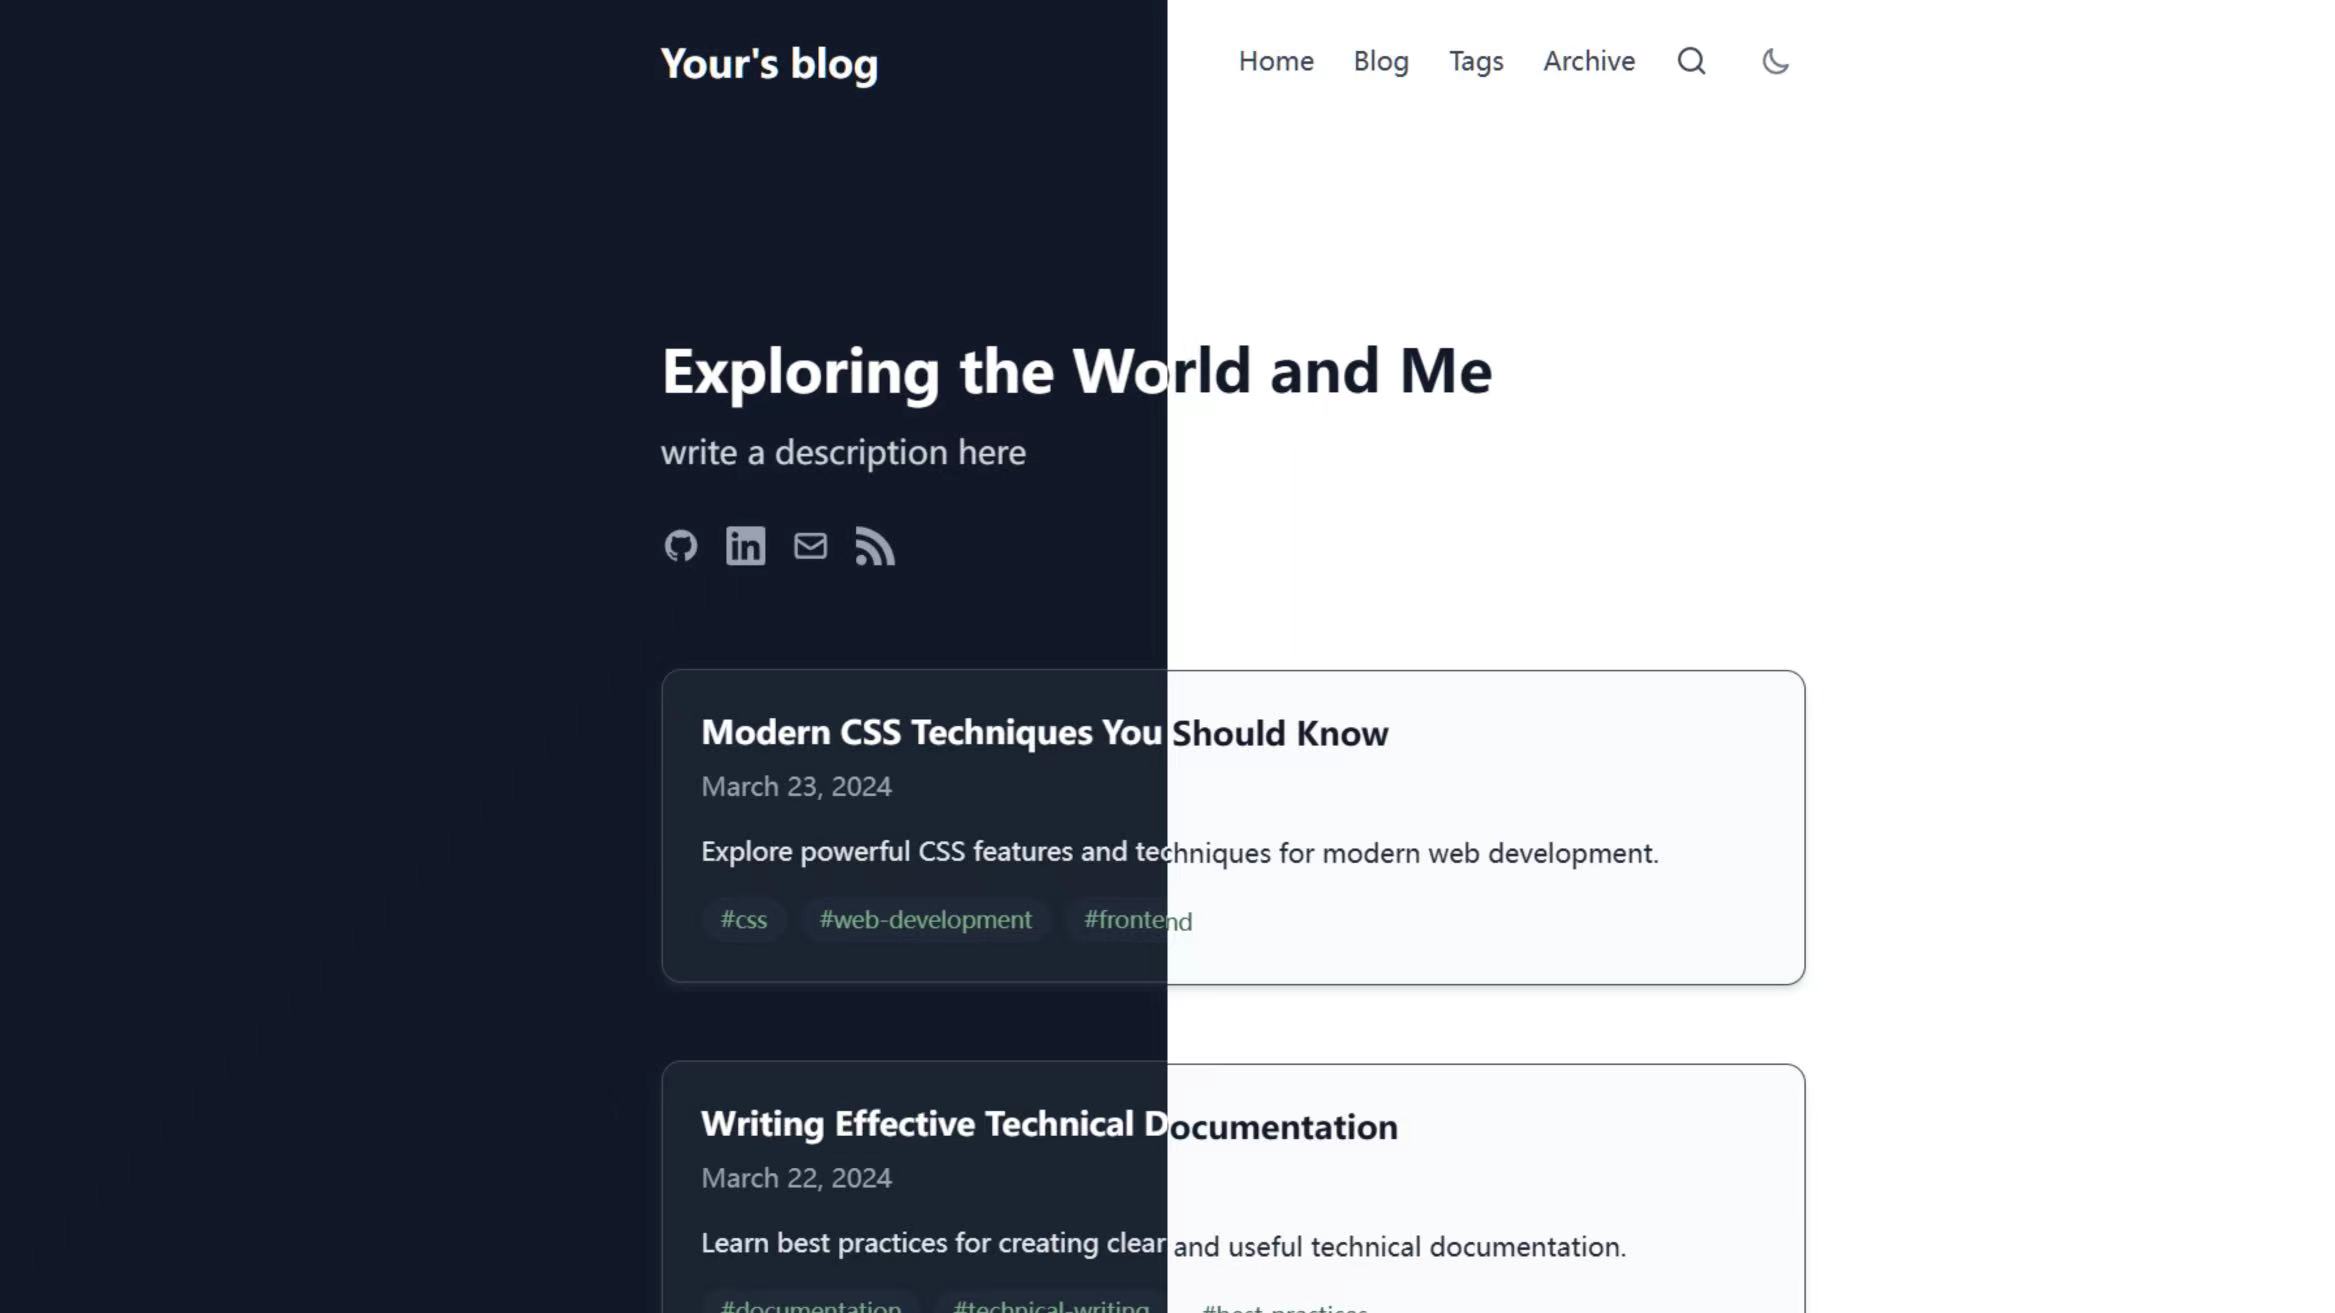
A minimal, responsive, and SEO-friendly blog template built with Astro. Features clean design, dark mode support, and markdown-based content management.
If you find this project helpful, please consider giving it a star ⭐️.
Awesome Blogs built on top of this template
For who want to build their own blog, I strongly recommend you to fork this repo and add your own features. This repo is a simple and clean blog template.
npm create astro@latest -- --template larry-xue/astro-zen-blog
cd ./to_your_project
Install dependencies:
npm install
Start the development server:
npm run dev
Configuration
Site Settings
Open src/config.ts and customize your site settings:
exportconstsiteConfig: SiteConfig={site: "https://example.com/",// your site URLtitle: "Your Blog",slogan: "Exploring the World with Code",description: "Write a description here",social: {github: "https://github.com/username",linkedin: "https://www.linkedin.com/in/username",email: "your@email.com",rss: true,},homepage: {maxPosts: 5,// Maximum number of posts to displaytags: [],// Only display posts with these tagsexcludeTags: [],// Exclude posts with these tags},googleAnalytics: "G-XXXXXXXXXX",// Google Analytics tracking IDsearch: true,// Enable local search};
HomePage Posts Filter
If you want more customization in homepage posts. You can customize the posts displayed by writing a custom filter with updating the filterPublishedPosts function in src/utils/posts.ts.:
Theme
Update primary and secondary colors in tailwind.config.js:
Writing Content
Create new blog posts in the src/content/blog/ directory
Use the following frontmatter template:
---title: "Your Post Title"description: "A brief description of your post"date: YYYY-MM-DDtags: ["tag1", "tag2"]image: "cover image URL"---
Your content here...
Of course, you can customize the metadata as needed in src/content/config.ts.
Creating New Posts
To create a new blog post, this template provide an npm scripts to help you create a new post:
# this will create a new markdown file in src/content/blog/filename.md
npm run new-post \<filename\>
You can customize the template of the new post in scripts/new-post.js.
* Part 1: Introduction to PyTorch and using tensors
* Part 2: Building fully-connected neural networks with PyTorch
* Part 3: How to train a fully-connected network with backpropagation on MNIST
* Part 4: Exercise - train a neural network on Fashion-MNIST
* Part 5: Using a trained network for making predictions and validating networks
* Part 6: How to save and load trained models
* Part 7: Load image data with torchvision, also data augmentation
* Part 8: Use transfer learning to train a state-of-the-art image classifier for dogs and cats
Some code in this repo is separated in blocks using #%%.
A block is as same as a cell in Jupyter Notebook. So editors/IDEs supporting this functionality is recommanded.
Scripts to facilitate the use of cloud storage providers (i.e. Google Drive) as storage for Plex media using rclone
Purpose
The purpose of this project is to use Cloud Drives as a means of storage for Plex. These scripts can support any cloud drive services that are supported by rclone. The main use case of this project specifically targets using Google Drive unlimited accounts. Traditionally, using a Drive account with Plex runs into issues with exceeding Google’s API call quota. This occurs during Plex scans of large media collections. To combat this, this project automates the uploading of media to a Drive account and automatically scans the individual directories where new media was placed. This means that only a small subset of the media library will be scanned as opposed to scanning the entire collection (requires automatic Plex scans to be switched off). The scripts also has the ability to upload media to multiple Google accounts for redundancy in a RAID 1-like manner. This can be useful if the Drive accounts have the potential to be banned or revoked (i.e. purchased on eBay, etc.).
Disclaimer
These scripts are use at your own risk, meaning I am not responsible for any issues or faults that may arise. I have tested these scripts on my own systems and verfied their functionality; however, due diligence is required by the end user. I am in no way affiliated with Google, Plex Inc., or rclone. I am not responsible if a ban is place on the user’s Drive account due to abuse or excessive API calls.
Edit path as needed and use rclone remote names configured in Step 3
Alternatively, plexdrive should also be able to achieve mounting the remote drive without needing to change anything.
Encrypted rclone mounts can also be used, but be sure to point your Plex libraries to the decrypted mounts and use the encrypted rclone mount names in the plexidrive config file.
Determine the Plex media section numbers for the Movies and TV Show libraries
Libraries must first be set up on the Plex server (map the Movies library to the rclone mounted path; same for TV Shows)
>~/PLEXiDRIVE$ sudo su -c 'export LD_LIBRARY_PATH=/usr/lib/plexmediaserver; /usr/lib/plexmediaserver/Plex\ Media\ Scanner --list' plex
1: Movies
2: TV Shows
See command and example output above
Copy the corresponding library section numbers to the plexidrive.conf (plex_movies_section_num & plex_tvshow_section_num)
Important Notes
Movies must be placed in the root of the Drive account in a folder called “Movies”
TV Shows must be placed in the root of the Drive account in a folder called “TV Shows”
TV Shows must be organized of the form: “(root)/Show Name/Season Number/files” (use an automation tool, such as SickRage or Sonarr for ease)
The script will not delete empty TV Show folders after successful uploading
Movies can be placed in individual folders or in the local Movies root directory
In order to avoid a ban on the Google Drive account with large Plex libraries, the automatic media scans within Plex server settings must be switched off
It’s very important to use the exact notation as described for the config file parameters or the scripts may not work at all
The plex-scan script must be run as root user (sudo ./plex-scan.sh) as the script must have the effective user as plex
Usage
Uploading media
Simply run the script below after configuring the Plex server and setting up the plexidrive.conf file
>~/PLEXiDRIVE$ ./plexidrive.sh
Scanning Plex library for new files
>~/PLEXiDRIVE$ sudo su -c './plex-scan.sh' plex
Cron jobs
In order to automate the uploading of media and Plex scans, cron jobs can be used. Add a cron job to the root crontab for the Plex scan, and to the local user’s account for the media uploads.
Create cloud simulators in Scala for evaluating executions of applications in cloud datacenters with different characteristics and deployment models.
How to run this program
sbt clean compile test
sbt clean compile run
On running the program, options will be displayed as to which simulation to run. Select 2,3 or 4.
Simulations and Results
Simulation 1: TimeShared VmSchedular as well as best fit Vm Allocation Policy. Analysis Changing the vm allocation policy did not result in price change.
Simulation2: This is a simulation with a mix of three or more datacenters (SaaS, PaaS, IaaS)
In this simulation, a broker will decide which data center to connect to based on the config provided by the client
for example, in Iaas, the client provides all the configuration of the Vms as per their choice
In PaaS, the client provides the number of Vms.
Analyis When simulating this, only 1 datacenter was utilized. That is, loss of resources.
Simulation 3 SpaceShared VmScheduler as well as First Fit VM allocation policy, with network datacenter
Analysis Increased cost of running cloudlets compared to simple datacenter.
Tests Various tests are ran in BasicCloudSimPlusExampleTestSuite testing proper vms and cloudlets creation
as well as proper datacenter such as IaaS, PaaS or SaaS.
Grade: 8%
This Git repo contains the description of the first homework and an example implementation of a baseline cloud simulation in Scala. This repo can be cloned using the command git clone git@github.com:0x1DOCD00D/CloudOrgSimulator.git. If interested to learn the implementation details, students can clone CloudSimPlus or ingest it directly into IntelliJ from its website or the Github repo, however, it is not required for this homework.
Preliminaries
As part of homework assignment you will gain experience with creating and managing your Git repository, obtaining an open-source cloud simulation infrastructure Java project from a public Git repo, creating tests using widely popular Scalatest framework, and expanding on the provided SBT build and run script for your simulation application. Doing this homework is essential for successful completion of the rest of this course, since all other homeworks and the course project will share the same features of this homework: branching, merging, committing, pushing your code into your Git repo, creating test cases and build scripts, and using various tools for diagnosing problems with your applications and the infrastructures that these applications are based on.
First things first, you must create your account at either BitBucket or Github, which are Git repo management systems. You can fork this repository into your account and proceed with the implementation of the homework. Please make sure that you write your name in your README.md in your repo as it is specified on the class roster. Since it is a large class, please use your UIC email address for communications and avoid emails from other accounts like funnybunny2000@gmail.com. If you don’t receive a response within 12 hours, please contact your TA or me, it may be a case that your direct emails went to the spam folder.
In this and all consecutive homeworks and in the course project you will use logging and configuration management frameworks. You will comment your code extensively and supply logging statements at different logging levels (e.g., TRACE, INFO, ERROR) to record information at some salient points in the executions of your programs. All input and configuration variables must be supplied through configuration files — hardcoding these values in the source code is prohibited and will be punished by taking a large percentage of points from your total grade! You are expected to use Logback and SLFL4J for logging and Typesafe Conguration Library for managing configuration files. These and other libraries should be imported into your project using your script build.sbt that I already created for you as a baseline. These libraries and frameworks are widely used in the industry, so learning them is the time well spent to improve your resumes.
Even though CloudSimPlus is written in Java, you can create your cloud simulations using Scala as a fully pure functional (not imperative) implementation. As you see from the StackOverflow survey, knowledge of Scala is highly paid and in great demand, and it is expected that you pick it relatively fast, especially since it is tightly integrated with Java. I recommend using the book on Programming in Scala Fourth and Fifth Editions by Martin Odersky et al. You can obtain this book using the academic subscription on Safari Books Online. There are many other books and resources available on the Internet to learn Scala. Those who know more about functional programming can use the book on Functional Programming in Scala published on Sep 14, 2014 by Paul Chiusano and Runar Bjarnason.
When creating your cloud simulation program code in Scala, you should avoid using vars and while/for loops that iterate over collections using induction variables. Instead, you should learn to use collection methods map, flatMap, foreach, filter and many others with lambda functions, which make your code linear and easy to understand. Also, avoid mutable variables that expose the internal states of your modules at all cost. Points will be deducted for having unreasonable vars and inductive variable loops without explanation why mutation is needed in your code unless it is confined to method scopes – you can always do without it.
Overview
In this homework, you will experiment with creading cloud computing datacenters and running jobs on them to determine how different organizations and pricing strategies result in variabilities of cloud offerings. Of course, creating real cloud computing datacenters takes hundreds of millions of dollars and acres of land and a lot of complicated equipment, and you don’t want to spend your money and resources creating physical cloud datacenters for this homework ;-). Instead, we have a cloud simulation framework, a software package that enables cloud engineers to model the cloud environments using different cloud computing models that we study in the lectures. We will use CloudSimPlus simulation framework that is an extension of CloudSim, a framework and a set of libraries for modeling and simulating cloud computing infrastructure and services.
This homework script is written using a retroscripting technique, in which the homework outlines are generally and loosely drawn, and the individual students improvise to create the implementation that fits their refined objectives. In doing so, students are expected to stay within the basic requirements of the homework and they are free to experiments. Asking questions is important, so please ask away!
Functionality
Once you have configured and run the minimal but complete CloudSimPlus example in this project, which should not take you more than 15 minutes, your job is to convert more cloud simulation examples into Scala and add to this project to perform more simulations where you will evaluate two or more datacenters with different characteristics (e.g., operating systems, costs, devices) and policies. Imagine that you are a cloud computing broker and you purchase computing time in bulk from different cloud providers and you sell this time to your customers, so that they can execute their jobs, i.e., cloudlets on the infrastructure of these cloud providers that have different policies and constraints. As a broker, your job is to buy the computing time cheaply and sell it at a good markup. One way to achieve it is to take cloudlets from your customers and estimate how long they will execute. Then you charge for executing cloudlets some fixed fee that represent your cost of resources summarily. Some cloudlets may execute longer than you expected, the other execute faster. If your revenue exceeds your expenses for buying the cloud computing time in bulk, you are in business, otherwise, you will go bankrupt!
There are different policies that datacenters can use for allocating Virtual Machines (VMs) to hosts, scheduling them for executions on those hosts, determining how network bandwidth is provisioned, and for scheduling cloudlets to execute on different VMs. Randomly assigning these cloudlets to different datacenters may result in situation where the executions of these cloudlets are inefficient and they takes a long time. As a result, you exhaust your supply of the purchased cloud time and you may have to refund the money to your customers, since you cannot fulfil the agreement, and you will go bankrupt. Modeling and simulating the executions of cloudlets in your clouds may help you chose a proper model for your business.
Once you experimented with the examples from CloudSimPlus, your next job will be to create simulations where you will evaluate a large cloud provider with many datacenters with different characteristics (e.g., operating systems, costs, devices) and policies. You will form a stream of jobs, dynamically, and feed them into your simulation. You will design your own datacenter with your own network switches and network links. You can organize cloudlets into tasks to accomplish the same job (e.g., a map reduce job where some cloudlets represent mappers and the other cloudlets represent reducers). There are different policies that datacenters can use for allocating Virtual Machines (VMs) to hosts, scheduling them for executions on those hosts, determining how network bandwidth is provisioned, and for scheduling cloudlets to execute on different VMs. Randomly assigning these cloudlets to different datacenters may result in situation where the execution is inefficient and takes a long time. Using a more clever algorithm like assigning tasks to specific clusters where the data is located may lead to more efficient cloud provider services.
Consider a snippet of the code below from one of the examples that come from the CloudSimPlus documentation. In it, a network cloud datacenter is created with network hardware that is used to organize hosts in a connected network. VMs can exchange packets/messages using a chosen network topology. Depending on your simulation construct, you may view different levels of performances.
Your homework can be divided roughly into five steps. First, you learn how CloudSimPlus framework is organized and what your building blocks from the CloudSimPlus framework you will use. You should explore the documentation of CloudSimPlus, load CloudSimPlus project into IntelliJ and explore its classes, interfaces, and dependencies. Second, you will experiment with designing your own cloud provider organization down to racks/clusters, hosts, virtual machines and processing entities. You will add various policies and load balancing heuristics like randomly allocating tasks to machines or using data locality to guide the task allocation. Next, you will create an implementation of the simulation(s) of your cloud provider using CloudSimPlus. Fourth, you will run multiple simulations with different parameters, varying them according to ranges of predefined value or by using probabilistic distribution to generate random values and you will statistically analyze the results and report them in your documentation with explanations why some cloud architectures are more efficient than the others in your simulations.
Students who use the main textbook will implement three or more datacenters each of which offers different mixes of SaaS, PaaS, IaaS and FaaS model implementations with various pricing criteria. A broker will decide to which datacenter your tasks will be sent based on additional information provided with those tasks, e.g., accessing SaaS services of some application or deploying your own software stack that will service some tasks. You will describe your design of the implementation of your simulation and how your cloud organizations/pricing models lead to different results and explain these results.
Students who use the alternative textbooks will create simulations that shows how a broadcast storm is created in the cloud that is described in the following alternative textbook: Guide to Reliable Distributed Systems: Building High-Assurance Applications and Cloud-Hosted Services (Texts in Computer Science) by Kenneth Birman. After creating two or more datacenters the implementation should result in a situation where the load is bounced between these datacenters putting a significant overhead on the network communication with little actual work done by the VMs. Understanding the process and implementing it can be done without any regard for a particular cloud service model.
Baseline
To be considered for grading, your project should include at least one of your simulation programs written in Scala, your project should be buildable using the SBT, and your documentation in README.md and accompanying files in the project subdirectory doc must specify how you create and evaluate your simulated clouds based on the cloud models that we learn in the class/textbooks. Your documentation must include the results of your simulation, the measurement of the runtime parameters of the simulator (e.g., CPU and RAM utilization) including under- and over-provisioning costs and your explanations of how these results help you with your simulation objectives (e.g., choose the right cloud model and configuration). Simply copying Java programs from examples and modifying them a bit (e.g., converting them to Scala or renaming some variables) will result in desk-rejecting your submission.
Collaboration
You can post questions and replies, statements, comments, discussion, etc. on Teams using the corresponding channel. For this homework, feel free to share your ideas, mistakes, code fragments, commands from scripts, and some of your technical solutions with the rest of the class, and you can ask and advise others using Teams on where resources and sample programs can be found on the Internet, how to resolve dependencies and configuration issues. When posting question and answers on Tea,s, please make sure that you selected the appropriate channel, to ensure that all discussion threads can be easily located. Active participants and problem solvers will receive bonuses from the big brother 🙂 who is watching your exchanges (i.e., your class instructor and your TA). However, you must not describe your simulation or specific details related how your construct your models!
Git logistics
This is an individual homework. If you read this description it means that you located the Github repo for this homework that includes a fully runnable sample cloud simulation project that you can build you homework solution on. You can fork this repository and your fork will be private, no one else besides you, the TA and your course instructor will have access to your fork. Please remember to grant a read access to your repository to your TA and your instructor. In future, for the team homeworks and the course project, you should grant the write access to your forkmates, but NOT for this homework. You can commit and push your code as many times as you want. Your code will not be visible and it should not be visible to other students (except for your forkmates for a team project, but not for this homework). When you push the code into the remote repo, your instructor and the TAs will see your code in your separate private fork. Announcing a link to your public repo for this homework or inviting other students to join your fork for an individual homework before the submission deadline will result in losing your grade. For grading, only the latest commit timed before the deadline will be considered. If your first commit will be pushed after the deadline, your grade for the homework will be zero. For those of you who struggle with the Git, I recommend a book by Ryan Hodson on Ry’s Git Tutorial. The other book called Pro Git is written by Scott Chacon and Ben Straub and published by Apress and it is freely available. There are multiple videos on youtube that go into details of the Git organization and use.
Please follow this naming convention to designate your authorship while submitting your work in README.md: “Firstname Lastname” without quotes, where you specify your first and last names exactly as you are registered with the University system, so that we can easily recognize your submission. I repeat, make sure that you will give both your TA and the course instructor the read/write access to your private forked repository so that we can leave the file feedback.txt with the explanation of the grade assigned to your homework.
Discussions and submission
As it is mentioned above, you can post questions and replies, statements, comments, discussion, etc. on Teams. Remember that you cannot share your code and your solutions privately, but you can ask and advise others using Teams and StackOverflow or some other developer networks where resources and sample programs can be found on the Internet, how to resolve dependencies and configuration issues. Yet, your implementation should be your own and you cannot share it. Alternatively, you cannot copy and paste someone else’s implementation and put your name on it. Your submissions will be checked for plagiarism. Copying code from your classmates or from some sites on the Internet will result in severe academic penalties up to the termination of your enrollment in the University.
Submission deadline and logistics
Friday, September 24, 2021 at 10PM CST via the bitbucket repository. Your submission will include the code for the simulator program, your documentation with instructions and detailed explanations on how to assemble and deploy your cloud simulation along with the results of your simulation and a document that explains these results based on the characteristics and the parameters of your simulations, and what the limitations of your implementation are. Again, do not forget, please make sure that you will give both your TAs and your instructor the read access to your private forked repository. Your code should compile and run from the command line using the commands sbt clean compile test and sbt clean compile run. Also, you project should be IntelliJ friendly, i.e., your graders should be able to import your code into IntelliJ and run from there. Use .gitignore to exlude files that should not be pushed into the repo.
Evaluation criteria
the maximum grade for this homework is 8%. Points are subtracted from this maximum grade: for example, saying that 2% is lost if some requirement is not completed means that the resulting grade will be 8%-2% => 6%; if the core homework functionality does not work or it is not implemented as specified in your documentation, your grade will be zero;
only some basic cloud simulation examples from the cloudsim repo are given and nothing else is done: zero grade;
having less than five unit and/or integration scalatests: up to 5% lost;
missing comments and explanations from the simulation program: up to 5% lost;
logging is not used in the simulation programs: up to 3% lost;
hardcoding the input values in the source code instead of using the suggested configuration libraries: up to 4% lost;
for each used var for heap-based shared variables or mutable collections: 0.2% lost;
for each used while or for or other loops with induction variables to iterate over a collection: 0.2% lost;
no instructions in README.md on how to install and run your simulator: up to 5% lost;
the program crashes without completing the core functionality: up to 6% lost;
the documentation exists but it is insufficient to understand your cloud simulation design and models and how you assembled and deployed all components of the cloud: up to 5% lost;
the minimum grade for this homework cannot be less than zero.
Listens for libvirt events and displays the relevant information of the VM.
The information displayed is:
VM name
the VM state
allocated CPU number
allocated and max memory
disks and their source
the list of network interfaces with their IP addresses
Implementation
The code is written in Python using the libvirt-python library.
The VIR_DOMAIN_EVENT_MAPPING and VIR_DOMAIN_STATE_MAPPING in constants.py file is based on the enum defined in libvirt codebase in include/libvirt/libvirt-domain.h files. (Source L51, L3014)
A default event is registered and virEventRunDefaultImpl() is invoked in a loop to process events. source
A callback domainEventRegisterAny is added to receive notification on any event, upon which the relevant information is displayed.
The information is displayed following the documentation of the library.
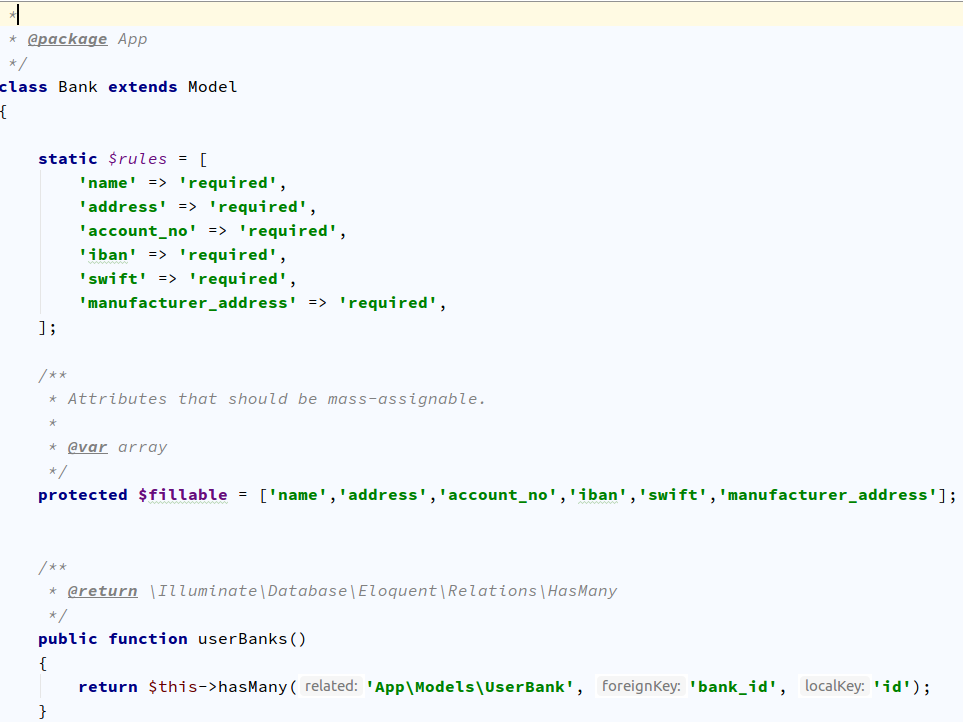
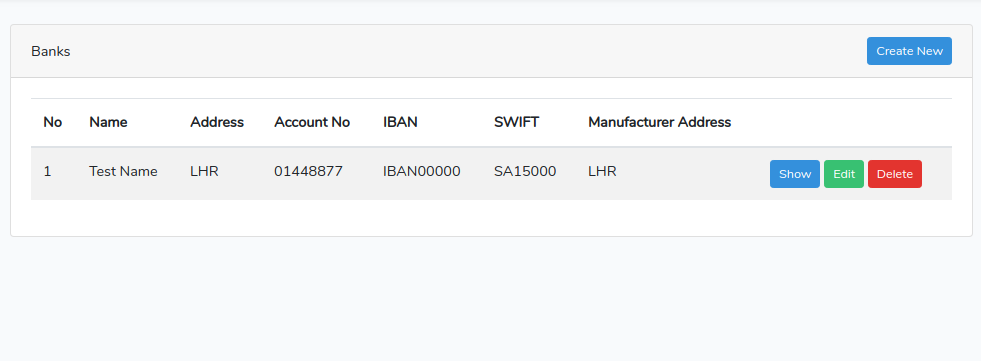
This Laravel Generator package provides and generate Controller, Model (with eloquent relations) and Views in Bootstrap for your development of your applications with single command.
This Laravel Generator package provides and generate Controller, Model (with eloquent relations) and Views in Bootstrap for your development of your applications with single command.
XE.com Inc. is the World’s Trusted Currency Authority. This project provides an SDK to interface with our XE Currency Data (XECD) product.
XE Currency Data is a REST API that gives you access to daily or live rates and historic mid-market conversion rates between all of our supported currencies.
You will need an api key and secret to use this sdk. Sign up for a free trial or register for a full account.
Installation
The preferred way to install this package is through composer.
xecd-rates-client-php is an open-source project. Submit a pull request to contribute!
Testing
cd xecd-rates-client-php
composer install
# Unit tests.
phpunit --testsuite Unit
# Integration tests.export XECD_RATES_API_ACCOUNT_ID=<YOUR_API_ACCOUNT_ID>export XECD_RATES_API_KEY=<YOUR_API_KEY>
phpunit --testsuite Integration
Security Issues
If you discover a security vulnerability within this package, please DO NOT publish it publicly. Instead, contact us at security [at] xe.com. We will follow up with you as soon as possible.
About Us
XE.com Inc. is The World’s Trusted Currency Authority. Development of this project is led by the XE.com Inc. Development Team and supported by the open-source community.
Official Repository by DSC CIET for Hacktoberfest.
Get your free T-shirt with us 😉
What is HacktoberFest
Hacktoberfest is open to everyone in our global community. Whether you’re a developer, student learning to code, event host, or company of any size, you can help drive growth of open source and make positive contributions to an ever-growing community. All backgrounds and skill levels are encouraged to complete the challenge.
Hacktoberfest is a celebration open to everyone in our global community.
Pull requests can be made in any GitHub-hosted repositories/projects.
You can sign up anytime between October 1 and October 31.
Rules
To earn your Hacktoberfest t-shirt or tree reward, you must register and make four valid pull requests (PRs) between October 1-31 (in any time zone). PRs can be made to any public repo on GitHub, not only the ones with issues labeled Hacktoberfest. If a maintainer reports your pull request as spam or behavior not in line with the project’s code of conduct, you will be ineligible to participate. This year, the first 70,000 participants who successfully complete the challenge will be eligible to receive a prize.
Check the rules in the ReadMe of the individual folders you want to contribute to.


 https://github.com/larry-xue/astro-zen-blog